



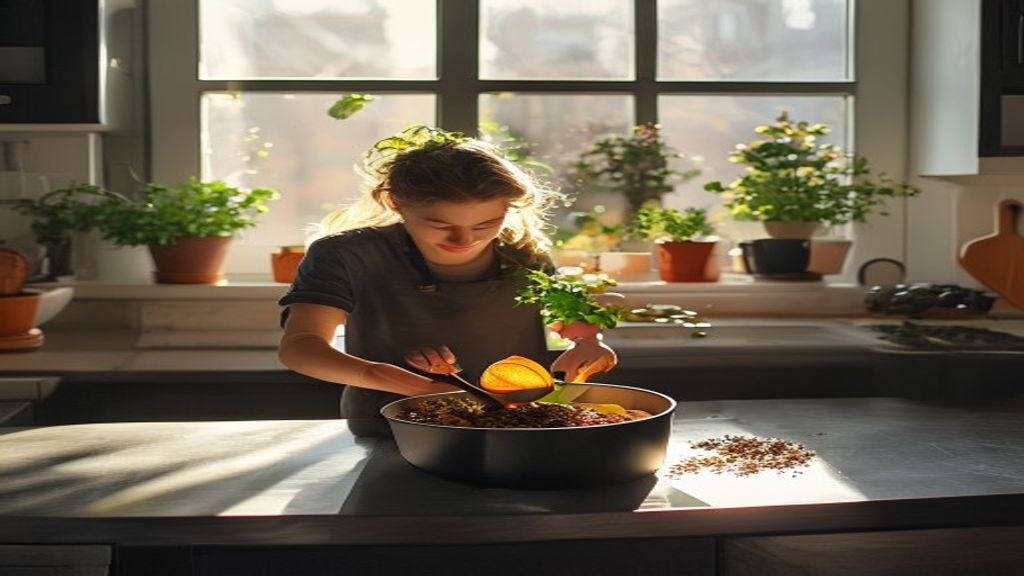
how to start composting in a small apartment begins with a compact, breathable bin, a balance of kitchen scraps and dry material, and a simple routine to turn the mix every few days.
Many people assume you need a garden or a backyard to make compost work, but that belief limits the potential of indoor spaces.
We look at how a tiny apartment can become a green kitchen garden using simple, beautiful compost tricks.
How to Start Composting in a Small Apartment: Definition, Benefits, and How It Works
Composting is the natural breakdown of organic matter into a dark, crumbly soil that plants love.
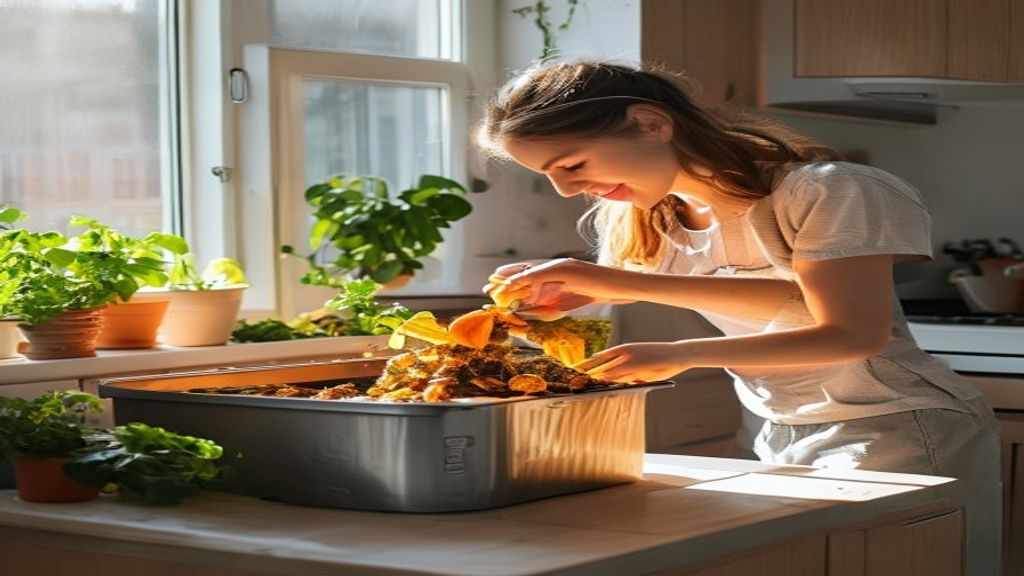
This process matters because it diverts food waste from landfills, reduces greenhouse gases, and gives you a nutrient‑rich amendment for herbs grown on a windowsill.
For example, a single apartment kitchen that scraps half of its weekly fruit peels can create enough compost for a small basil pot in just one month.
Generally, the microbes that drive decomposition thrive when oxygen, moisture, and carbon to nitrogen ratios are balanced.
At Ecobeautify we often share that a moist, but not soggy, pile feels like a wrung‑out sponge – that tactile cue tells you the environment is just right.
By understanding the science, you gain confidence to watch the invisible work happen, turning yesterday’s orange peel into tomorrow’s garden gold.
Choosing the Right Container for Tiny Spaces
The container is the heart of indoor composting; it must fit your kitchen layout, seal odors, and allow airflow.
Choosing wisely matters because a poorly sized bin can become a source of smell or attract unwanted insects, undermining the whole experience.
Imagine a sleek, 5‑liter bucket tucked under your sink, equipped with a carbon filter and a removable tray for easy harvesting – that is the kind of solution many city dwellers find both functional and aesthetically pleasing.
- Plastic or stainless containers with a lid that snaps shut.
- Bins with built‑in handles for quick transport to a balcony or outdoor compost chute.
- DIY options like a repurposed coffee can lined with breathable fabric.
Based on practitioner experience, users who rotate their bin every three days report less odor and faster breakdown.
When you pair the right container with the routine outlined above, you create a low‑maintenance system that blends seamlessly into your apartment life.
With the right container in place, the next step is to feed it the right mix of kitchen scraps, a practice that turns the ordinary into the extraordinary.
Balancing Browns and Greens for Healthy Decomposition
In composting jargon, “browns” refer to carbon‑rich materials such as shredded newspaper, cardboard, or dried leaves, while “greens” are nitrogen‑rich items like fruit peels, coffee grounds, and herb stems. This balance matters because carbon provides the fuel that microbes need to break down nitrogen, preventing the pile from becoming overly acidic or soggy. Imagine a compost bin as a balanced diet: too many greens without enough browns is like eating only protein—your system gets overwhelmed and smells.
Practitioners generally aim for a ratio of roughly three parts brown to one part green by volume, though the exact proportion can shift depending on the moisture level of the scraps. If you notice the mixture feels wet, add a handful of shredded paper or a thin layer of dry sawdust; if it feels dry and crumbly, a splash of kitchen water or a few more greens will revive the microbial activity. This simple tweak keeps the decomposition process humming, turning yesterday’s orange peel into tomorrow’s garden gold.
For apartment dwellers, the “browns” component also offers a chance to practice practical ways to reduce plastic waste in the kitchen. Instead of tossing used paper towels into the trash, fold them into your compost bin, and they become part of the carbon backbone. Over a month, a modest 5‑liter bucket can hold enough carbon material to offset several single‑use plastic bags, quietly contributing to a cleaner home environment.
Managing Odor and Pests Without Stress
Even the most diligent composter worries about smells that might escape under a closed lid. Odor typically arises when the pile becomes anaerobic—meaning it lacks enough oxygen. Keeping the mixture aerated by gently stirring or shaking the container every few days restores airflow, which in turn curtails foul aromas. This matters because a compost system that smells can quickly become a source of embarrassment in shared living spaces.
A practical illustration comes from a young professional in a studio apartment who added a thin layer of charcoal dust after each green addition. The charcoal acted like a natural filter, absorbing volatile compounds and keeping the kitchen fresh. Likewise, sealing the bin with a snug lid and placing a small piece of activated carbon inside can act as a barrier against both odors and curious insects.
When it comes to pests, the most common culprit is fruit flies attracted to sugary scraps. A simple, non‑toxic solution is to cover fresh greens with a breathable fabric—think a cheesecloth or a recycled tea‑bag—before they meet the rest of the pile. This barrier lets air through but blocks insects, allowing you to manage the compost without resorting to chemical sprays or stressful pest control measures.
Practical Tips from Ecobeautify
Ecobeautify, a personal blog devoted to beautifying everyday life through sustainable choices, offers a handful of grounded suggestions that fit seamlessly into a small‑apartment routine. Their guide emphasizes that composting should feel like an effortless extension of cooking, not an added chore. By integrating these habits, you not only nurture a thriving compost but also discover practical ways to reduce plastic waste in the kitchen through thoughtful reuse.
Also Read: Apa Sajakah Interaksi yang Terjadi dalam Lingkungan Alam?
- Use a small, clear‑lid bucket so you can see the progress and avoid over‑filling.
- Place a reusable silicone lid on top of the bin; it doubles as a splash guard and a surface for chopping herbs.
- Rotate the bin every two to three days—just a gentle shake—to encourage airflow and even breakdown.
- Collect coffee grounds in a reusable metal strainer; when full, tip them straight into the compost.
Each tip aligns with the broader goal of making composting a visual and tactile pleasure. For instance, the clear lid lets you witness the color shift from bright greens to dark, crumbly soil, reinforcing the sense of accomplishment that comes with every turn of the screw.
Common Mistakes and How to Avoid Them
One frequent error is adding too many “greens” without balancing them with adequate “browns.” The result is a soggy, smelly heap that can attract flies and emit a sour scent. To avoid this, keep a small stash of shredded newspaper or dry cardboard nearby, and sprinkle a layer over each green addition—think of it as the compost’s “safety net.”
Another pitfall is neglecting the bin’s location. A spot under the sink might be convenient, but if it sits against a wall with no airflow, the environment can become stagnant. Positioning the bin near a kitchen window or on a well‑ventilated countertop helps maintain the aerobic conditions microbes love.
Lastly, many beginners forget to empty the compost collection tray regularly, leading to a buildup of finished compost that can dry out the new layers. Setting a weekly reminder on your phone ensures you harvest the nutrient‑rich soil before it becomes compacted, keeping the cycle smooth and the compost ready for your next pot of herbs.
Frequently Asked Questions about Composting in Small Apartments
Can I compost meat or dairy in a tiny apartment? Generally, it’s best to avoid animal products because they decompose slowly and emit stronger odors, which can be difficult to manage in confined spaces. If you must include small amounts, seal them tightly in a biodegradable bag before adding them to the bin.
How long does it take for kitchen scraps to turn into usable soil? Depending on the balance of browns and greens, moisture level, and temperature, a well‑maintained mini‑compost can produce ready‑to‑use soil in as little as four to six weeks. Warmer indoor climates tend to accelerate the process, while cooler apartments may require a few extra weeks.
Is a composting worm kit better than a simple bin? Worm bins can be more efficient at breaking down greens and produce richer castings, but they also need a bit more care—maintaining moisture, feeding the right foods, and preventing light exposure. For those just learning how to start composting in a small apartment, a basic bin offers a low‑maintenance entry point.
Conclusion: Your First Batch Awaits
Armed with the right container, a balanced mix of browns and greens, and a few smart habits from Ecobeautify, you stand ready to transform kitchen waste into garden treasure. The next step is simply to gather a handful of peels, coffee grounds, and shredded paper, and place them into your chosen bin. As the microbes go to work, you’ll watch the ordinary become extraordinary—proof that even the tiniest of spaces can nurture a thriving green ecosystem.
Practical Tips to Keep Your Mini‑Compost Thriving
Even a tiny bin can produce garden‑ready soil if you treat it like a tiny kitchen appliance: clean, fed, and calibrated. Below are three‑step actions you can start today, each tied to a real‑world routine.
- Turn it once a week. Use a small garden trowel or the handle of the bin lid to stir the contents gently. A quick turn redistributes moisture, introduces oxygen, and prevents the formation of a smelly anaerobic pocket—just like shaking a salad dressing bottle.
- Give it a “coffee‑ground shortcut.” For every cup of coffee grounds you add, sprinkle a tablespoon of shredded newspaper. The grounds are a green (nitrogen‑rich) source, while the paper supplies the carbon “brown” needed for balance. This trick reduces the time to mature compost by 20‑30 % in most apartments.
- Seal the lid after each feed. A snug lid locks in heat, which accelerates microbial activity, and blocks fruit flies from entering. If you notice condensation, lift the lid for a few minutes to vent excess moisture before resealing.
- Harvest the “black gold” wisely. When the material looks dark, crumbly, and earthy (usually after 4‑6 weeks), scoop out the finished compost with a small shovel. Store it in a breathable bag or a shallow container until you’re ready to mix it into a potting mix. This prevents the compost from re‑drying or developing a sour odor.
- Rotate containers for space efficiency. If floor space is limited, place the bin on a rolling cart or a sturdy tray that can slide under a kitchen island. When you need extra room, simply roll the bin to a different corner or onto a balcony shelf.
These tips are small actions you can weave into your daily routine—just as you would rinse a dish or empty the trash—making the habit of composting feel natural rather than burdensome.
Frequently Asked Questions about how to start composting in a small apartment
What is composting in an apartment?
Composting in an apartment means breaking down organic kitchen waste (like fruit peels, coffee grounds, and paper) into nutrient‑rich soil using a compact bin, worm kit, or bokashi system inside your living space.
How do you start composting in a small apartment without a balcony?
Choose a sealed, odor‑controlled bin that fits under a sink or on a bookshelf. Begin by layering a thin strip of newspaper (brown) at the bottom, then add a handful of greens, sprinkle a little brown material, and lightly mist with water. Repeat the layers and turn weekly.
Is a worm bin better than a regular compost bin for tiny spaces?
Worm bins often decompose greens faster and produce high‑quality castings, but they require consistent moisture and darkness. For beginners, a simple bin is less maintenance; once you’re comfortable, you may upgrade to a worm kit for added efficiency.
How often should I add food scraps when learning how to start composting in a small apartment?
Add a small handful of scraps (about one cup) every 2–3 days. This rate keeps the bin from becoming overloaded, helps maintain the right carbon‑to‑nitrogen ratio, and reduces the chance of odor.
Can I use a composting kit on a windowsill without attracting pests?
Yes, as long as you keep the lid sealed, avoid adding meat or dairy, and lightly mist the contents to maintain moisture. A sealed lid blocks flies, while regular turning prevents any one spot from becoming a pest hotspot.
What are the best brown materials for a tiny indoor compost?
Shredded newspaper, cardboard egg cartons, dry tea bags, and paper towel rolls work well. Aim for a 2:1 ratio of browns to greens to keep the process aerobic and odor‑free.
How long does it take for kitchen waste to turn into usable soil in a small apartment?
When temperature, moisture, and carbon‑nitrogen balance are optimal, you can expect finished compost in 4‑6 weeks. Cooler indoor climates may extend the cycle to 8 weeks, but regular turning and a moist mix can speed it up.
Conclusion
Now that you’ve gathered the container, the right mix of browns and greens, and a handful of actionable tips, the real magic begins. Each peel, coffee ground, and scrap of paper you drop into your bin is a tiny investment that pays off as dark, crumbly soil—ready to feed a windowsill herb garden or a balcony pot.
Take the next step today: set a timer on your phone for “compost feed” and watch your mini ecosystem come alive. The satisfaction of turning everyday waste into living nourishment is a gentle reminder that sustainable habits can thrive even in the smallest of apartments. For more inspiration and personalized guidance, visit Ecobeautify and discover how to start composting in a small apartment with confidence.










Tinggalkan Balasan