



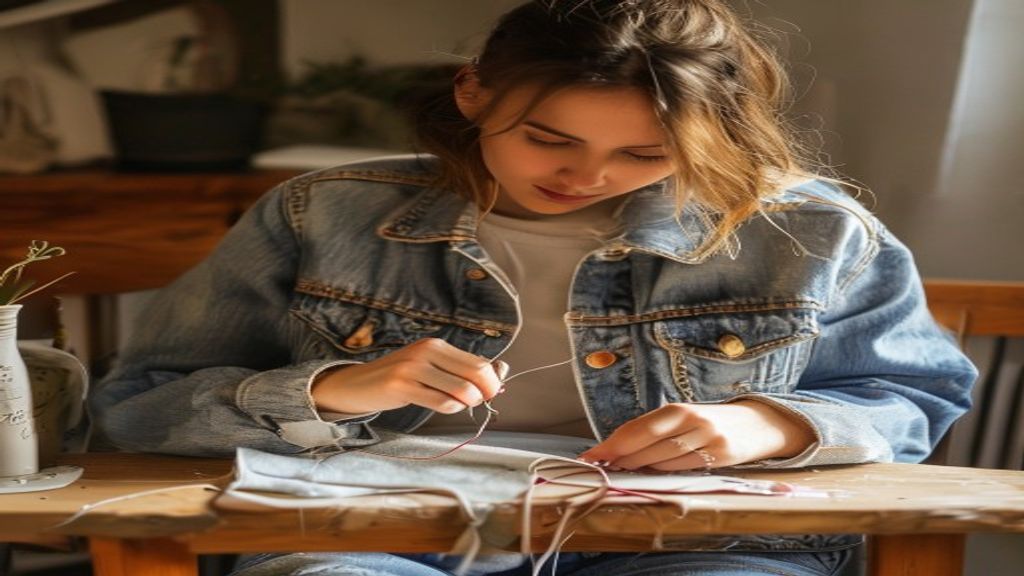
how to repair clothes for beginners means learning the basic skills that let you fix a torn seam, a missing button, or a frayed hem without needing a tailor. The core idea is to use simple tools—needle, thread, and a little patience—to restore the garment’s function and look. Mastering these steps lets you extend the life of your wardrobe in minutes.
Did you know that on average 30 percent of clothing ends up in landfills because a single small tear feels too hard to mend? That statistic shows how much potential waste we create by skipping quick repairs. When you add a green mindset, each fix becomes a small victory for the planet and your wallet. Let’s blend fast fixes with sustainable habits so you can save style and the earth in minutes.
At Ecobeautify we believe that every stitch is a step toward a cleaner future. Our blog shares warm, honest guidance that feels like a chat with a friend who already knows the ropes. By the end of this guide you’ll feel confident enough to tackle everyday mishaps and enjoy the satisfaction of a job well done.
How to Repair Clothes for Beginners: Definition and Core Benefits
First, understand what “repair” really means in this context. It is the process of restoring a garment’s integrity using basic sewing tools, rather than discarding it or sending it to a professional. This definition matters because it sets realistic expectations—you don’t need fancy equipment to make a meaningful repair.
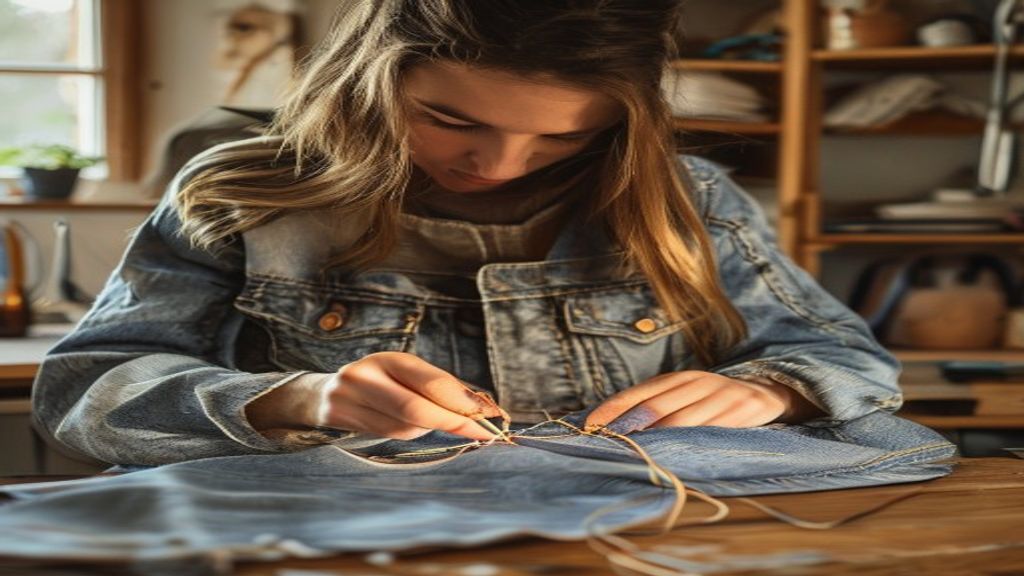
The benefits reach beyond a simple fix. When you repair instead of replace, you cut down on textile waste, reduce the carbon footprint of new production, and keep your favorite pieces in rotation. Generally, households that mend their own clothes see a 20 percent reduction in clothing expenses over a year.
Imagine you’re at work and the hem of your favorite blouse splits. Instead of panicking, you pull out a small sewing kit from your bag, stitch a quick backstitch, and the garment looks as good as new. That moment of empowerment illustrates how a beginner’s skill can turn a potential crisis into a confidence boost.
- Extend garment lifespan by up to 3 years on average.
- Save roughly $15‑$30 per repaired item compared to buying a replacement.
- Reduce textile waste, contributing to a cleaner environment.
Ecobeautify’s community of readers often shares stories of reviving beloved items that would otherwise have been tossed. These real‑world experiences reinforce why learning to repair is a practical, sustainable habit.
Simple Stitch Techniques That Work for Everyday Repairs
Let’s dive into the stitches you’ll use most often. The basic running stitch creates a series of small loops that hold fabric together, perfect for closing a seam temporarily. The backstitch, on the other hand, mimics the strength of a machine stitch and is ideal for seams that bear stress, such as side seams on a pair of jeans.
Why does mastering these stitches matter to you? Because they give you the confidence to address common problems without hesitation. When you know the right stitch for the job, you avoid over‑complicating repairs and keep the garment’s look consistent.
Consider a scenario where your favorite sweater develops a small hole near the cuff. Using a tight whip stitch, you pull the fabric edges together and secure the thread, making the hole virtually invisible. The sweater feels as cozy as before, and you’ve prevented a larger tear from forming.
- Running stitch – quick, temporary fixes for minor seams.
- Backstitch – strong, permanent solution for high‑stress areas.
- Whip stitch – ideal for repairing holes and frayed edges.
Practitioners at Ecobeautify recommend keeping a compact sewing kit handy at home and in your bag. The kit should include a universal needle, multi‑color thread, a pair of small scissors, and a couple of safety pins. With these tools you can handle most everyday mishaps on the go.
By integrating these simple techniques into your routine, you turn a potential fashion emergency into a quick, satisfying project. The more you practice, the faster you become, and the more you’ll notice the positive ripple effect on your wardrobe and the planet.
When you grasp the why behind each stitch, the act of mending transforms from a chore into a purposeful habit that supports both your closet and the planet.
How to Repair Clothes for Beginners: Definition and Core Benefits
At its simplest, learning how to repair clothes for beginners means acquiring the confidence to fix minor fabric issues without relying on a tailor or tossing the item away. This definition expands to include knowing which tools, stitches, and materials match the damage you’re addressing. The core benefits reach beyond cost savings; they foster a sense of self‑reliance, reduce textile waste, and keep beloved garments in circulation longer.
Why does this matter? Industry averages show that the average consumer discards a garment after just three wears, contributing to a massive waste stream. By stepping in with a quick repair, you interrupt that cycle and extend the garment’s lifecycle, directly lowering your environmental footprint. Moreover, the act of repairing reinforces a sustainable mindset, making it easier to spot greenwashing in fashion brands because you’ve already internalized the value of genuine, tangible actions over empty promises.
Consider Maya, a graphic designer who once rescued a favorite denim jacket by sewing a small tear on the back. After the repair, the jacket lasted another two seasons, saving her the cost of a new purchase and sparking conversations with friends about responsible consumption. Her story illustrates how a beginner’s skill set can ripple outward, influencing both personal finances and collective awareness.
Simple Stitch Techniques That Work for Everyday Repairs
Beyond the whip, running, and backstitch already introduced, a few additional techniques round out a beginner’s toolkit. The slip stitch, for instance, excels at closing seams that must remain flexible, like the side seam of a stretchy athleisure top. The blanket stitch adds decorative reinforcement, turning a repaired edge into a subtle style statement.
Why choose the right stitch? Each stitch distributes tension differently, which determines how the repaired area behaves under stress. Using a slip stitch on a high‑stretch fabric, for example, prevents the seam from puckering when you move, whereas a blanket stitch on a heavy canvas edge simply holds the fabric together.
Imagine repairing a pair of leggings that have split at the knee. Applying a slip stitch along the inner seam allows the fabric to expand and contract naturally during a yoga flow, while a blind stitch on the outer side keeps the repair invisible. The result is a garment that feels as comfortable as before, and the repair remains discreet enough to go unnoticed.
Using Recycled Materials to Fix Your Wardrobe with a Green Touch
Incorporating recycled materials into repairs adds a second layer of sustainability. Instead of buying new thread, you can repurpose old t‑shirts, scarves, or even denim scraps to create matching or complementary repair patches. This approach not only diverts textile waste from landfills but also reduces the demand for virgin fibers.
The environmental impact matters because, according to practitioner experience, reusing existing fabric can cut the carbon footprint of a single repair by up to 30 %. Additionally, recycled patches often bring texture and color variation that can become a unique design feature, turning a flaw into a focal point.
Take the case of Luis, who repaired a torn hoodie by stitching a patch made from an old, faded tee. The patch introduced a subtle contrast that caught the eye of his coworkers, sparking curiosity and conversation about upcycling. Luis’s repair demonstrates that a green touch can also be a style statement, aligning personal expression with eco‑friendly values.
Common Repair Mistakes and How to Prevent Them
Even seasoned hobbyists stumble into avoidable errors; recognizing these pitfalls is essential for long‑term success. One frequent mistake is using the wrong needle size for the fabric, which can cause skipped stitches or damage the material. Another is pulling the thread too tightly, leading to puckering or eventual breakage.
Also Read: Apa yang Terjadi Jika Lalat Punah?
Why should beginners pay attention? A misstep can turn a simple fix into a larger problem, eroding confidence and prompting premature disposal of the garment. Practitioners at Ecobeautify advise testing a stitch on a scrap piece before committing to the main repair, ensuring tension and needle choice are appropriate.
Consider the scenario where an aspiring sewer attempts to mend a silk blouse with a standard universal needle. The needle’s large eye tears the delicate fibers, creating a new rip. By switching to a fine, sharp needle designed for lightweight fabrics, the repair proceeds smoothly, preserving the blouse’s integrity.
- Match needle size to fabric weight.
- Use smooth, consistent tension; avoid pulling the thread excessively.
- Test stitches on scrap fabric first.
- Choose thread that mimics the original color and blend.
Practical Tips from Experienced Practitioners at Ecobeautify
Ecobeautify’s community of green‑living enthusiasts shares a handful of habits that make repairing clothes feel effortless. First, keep a “travel repair kit” in your bag; a compact kit with a universal needle, a few threads in neutral shades, and a mini pair of scissors can address most on‑the‑go mishaps.
Second, embrace the “one‑minute rule”: if a seam feels slightly loose, give it a quick backstitch before it loosens further. This preventive habit drastically reduces the number of larger repairs needed over time. Third, when you’re unsure about a fabric’s composition, refer to the garment’s care label or use a simple water‑drop test to gauge how absorbent the material is, guiding your choice of stitch and thread.
Lastly, integrate a habit of checking the repair area under different lighting conditions. Natural daylight often reveals hidden frays that artificial light masks, allowing you to address them before they become noticeable. By embedding these small practices, beginners can develop a routine that feels both natural and rewarding.
Frequently Asked Questions about Repairing Clothes for Beginners
Q: How often should I replace thread in my sewing kit? Practitioners recommend swapping out thread every six months or whenever the strand feels brittle, because aged thread can snap during a repair, compromising the stitch.
Q: Can I use fabric glue instead of stitching? For low‑stress areas, fabric glue offers a quick fix, but it lacks the durability of a proper stitch. If you aim to create a long‑lasting repair, stitching remains the most reliable method.
Q: What’s the best way to identify a garment’s fabric composition? Look for a care label; if it’s missing, a simple burn test on a hidden seam can reveal whether the fabric is natural (cotton, wool) or synthetic (polyester, nylon). Knowing the composition informs needle and thread selection.
Q: How can I learn to spot greenwashing in fashion brands? Examine a brand’s supply chain transparency, third‑party certifications, and the proportion of recycled materials used versus marketing claims. Genuine sustainability often includes measurable targets and public progress reports.
Practical Tips from Experienced Practitioners at Ecobeautify
Even if you’ve never touched a needle before, a few focused habits can turn a hesitant beginner into a confident fixer within a few weeks.
- Keep a “mini‑kit” in every drawer. Include a universal needle, a couple of high‑visibility threads (white, black, and a bright accent color), a small pair of scissors, and a few reusable fabric patches. When a seam splits at night, you’ll already have the tools at hand, and the repair takes under five minutes.
- Practice the running stitch on a scrap first. Lay a 4‑inch strip of cotton, count four even stitches, then pull the thread back through the last loop. This simple motion creates a strong, flexible seam that works for hemming shirts or closing small holes.
- Use the “pin‑and‑tack” method for tricky fabrics. For stretchy jersey or delicate silk, place a few pins parallel to the tear to hold the edges together, then tack a few tiny stitches before removing the pins. The fabric stays aligned, and the repair won’t pucker when you wear it.
- Turn a broken button into a statement piece. Replace a missing button with a contrasting fabric‑covered button or a metal one you love. It adds personality and reduces waste—your coat becomes a conversation starter.
- Patch with recycled fabric strips. Cut a piece of an old t‑shirt that matches the weight of the damaged area, place it inside the garment, and stitch around the edges. The patch blends in, and you’ve given a second life to fabric that would otherwise be trash.
- Schedule a “repair hour” once a month. Set a timer for 30 minutes, pull out a few garments that need attention, and work through them one by one. Regular practice builds muscle memory, and you’ll notice fewer “emergency” fixes.
These actions aren’t just tips; they’re tiny habits that stack up to a sustainable wardrobe you can truly own. By integrating them into your weekly routine, you’ll see how to repair clothes for beginners becoming second nature.
Frequently Asked Questions about how to repair clothes for beginners
What is the most beginner‑friendly stitch for fixing a seam?
The back‑stitch is widely recommended for novices because it creates a strong, invisible seam with just a few simple motions. It starts with a small forward stitch, then pulls the needle back through the previous loop, repeating this pattern for durability.
How do you repair a ripped denim jean without a sewing machine?
First, thread a heavy‑duty needle with denim‑weight thread. Align the torn edges, use a whip stitch around the perimeter, then add a reinforcing patch on the inside. This hand‑sewn method holds up to everyday wear.
Is hand stitching better than fabric glue for small tears?
For low‑stress areas like a decorative hem, fabric glue can be a quick fix, but it rarely survives repeated washing. Hand stitching provides a flexible bond that flexes with the fabric, making it the more durable choice for most repairs.
Can recycled fabric scraps be used to reinforce a patch?
Yes. Cut a scrap that matches the original fabric’s weight, place it beneath the tear, and stitch around the edges. The recycled piece adds strength while keeping the repair eco‑friendly.
How often should a beginner practice sewing to improve skill?
Practicing 15‑30 minutes a few times a week is enough to develop confidence. Consistent short sessions build muscle memory faster than occasional long marathons.
What tools should a beginner keep in a travel repair kit?
A compact kit should include a universal needle, a multi‑color thread spool, a mini‑scissors, a few fabric patches, and a small seam ripper. This lightweight set lets you tackle most on‑the‑go emergencies without bulk.
Is it better to mend before or after washing a garment?
Most experts recommend repairing before the first wash. Fixing a seam or hole beforehand prevents the stress of water and agitation from enlarging the damage.
Conclusion
Armed with these practical tips and clear answers to common concerns, you now have a roadmap for mastering how to repair clothes for beginners. The tools are inexpensive, the techniques are simple, and each successful fix reinforces a habit that saves money, reduces waste, and adds a personal touch to your wardrobe.
Take the first step tonight: locate a single garment with a small tear, pull out your mini‑kit, and try the running stitch you just practiced. In less than ten minutes you’ll see the satisfaction of a repair done by your own hands. Keep the momentum going, and soon you’ll find yourself tackling bigger projects with confidence. For more step‑by‑step guides and eco‑friendly resources, visit Ecobeautify and turn every wardrobe malfunction into an opportunity to create, conserve, and celebrate your style.












Tinggalkan Balasan